I LOVE any type of containers to keep things organized. Having 3 boys doesn't always make it easy to keep things neat though. I had this cute little fabric bucket for my 8 month old but after Christmas it couldn't fit all of his toys anymore that we keep for him in the living room.
Now I finally made him a bigger one.
 |
| Before |
 |
| After |
************************************** |
I bought this pre-quilted fabric on sale at
Joanns some time ago. Never knew what I would use it for..until today. Pre-quilted
fabric is awesome because you don't have to worry about buying matching fabric
and stabilizer, but most of all, it saves time!
|
 |
| First of all, you cut your two pieces. The first will be a rectangle. 15" x 40". If your fabric is 42" wide, just leave the 2 extra inches on. It's not really necessary to trim it because later on you will have to trim it anyway. |
 |
| Your second piece should be at least 13" x 13". You don't have to be completely exact on this one either because you will trim it as well. |
 |
| Now take you 13x13 square and fold it in half. It doesn't matter what fabric side is face up or down. |
 |
| Now fold it in half again. Two sides should have rough edges and two sides folded edges. Have the two sides with the folded edges facing to the left and down. (Your square will have 4 fabric layers all together.( |
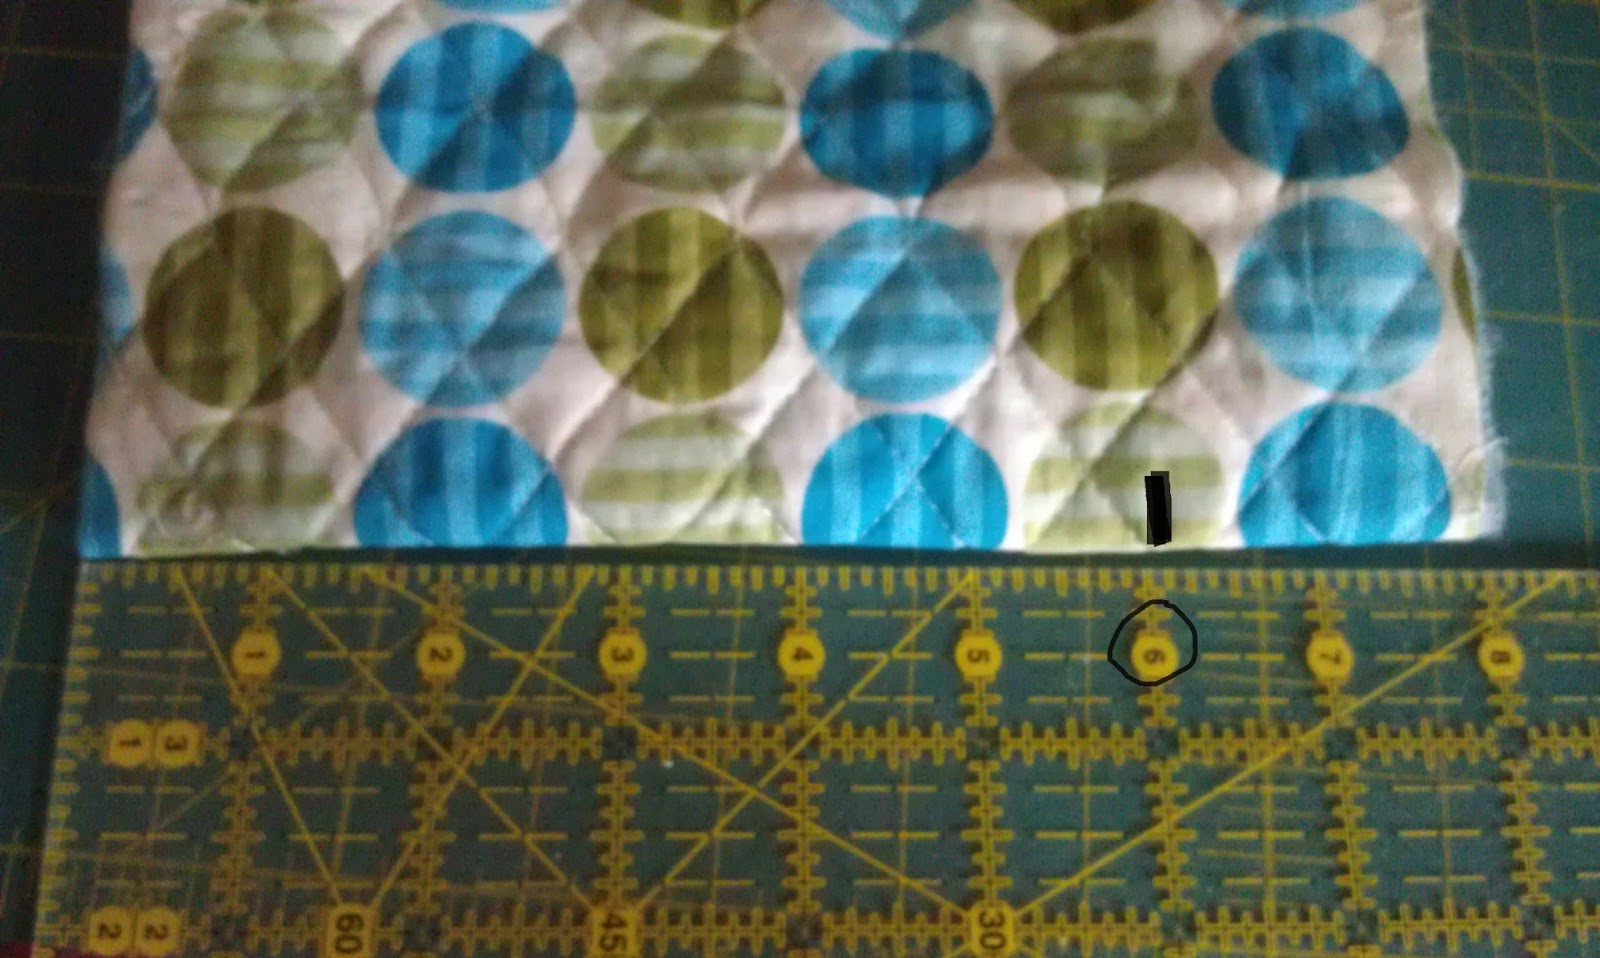 |
| Take the ruler and level "0" on the bottom left corner. Meassure 6" and mark it with a pencil or similar. |
 |
| Now keep doing this as seen in the picture, all the way to the left edge. Make sure to level "0" or "6" on the corner, to make sure every mark is 6" from the corner. |
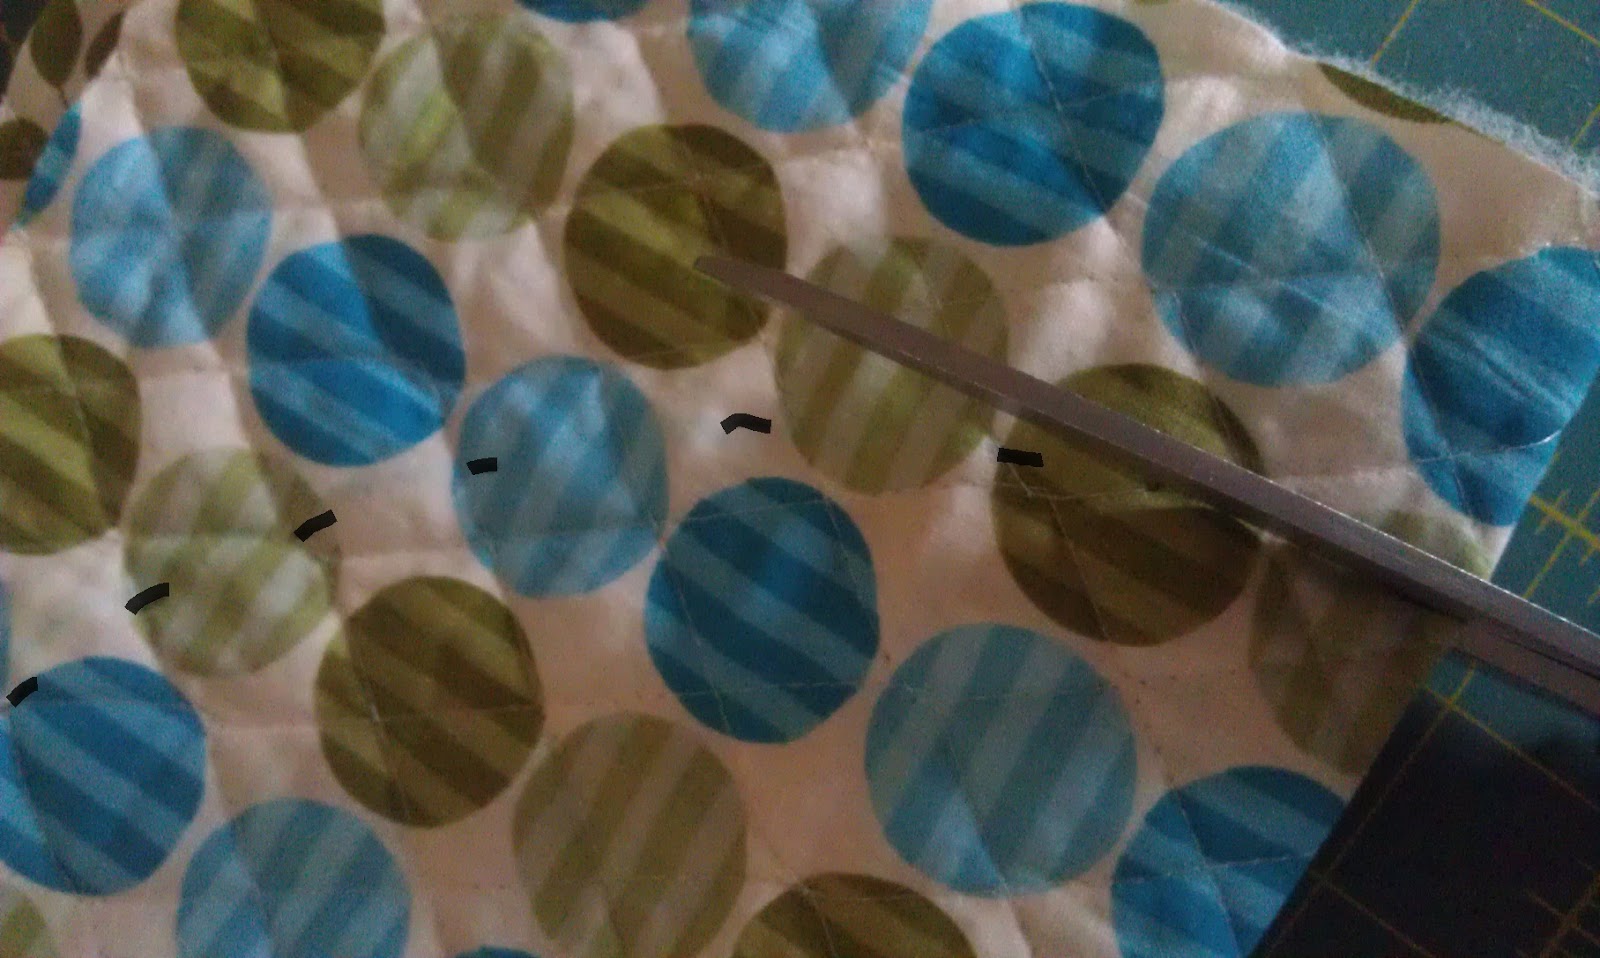 |
| Now cut along the marks, holding the fabric together with your other hand . |
 |
| Now unfold and you will have a 12" circle. |
 |
| Decide what fabric is going to show on the outside later on. Let's call the side with the outside fabric O and the side with the inside fabric I. Place your fabric with O facing up on your table. Now take your long rectangle piece of fabric, and start pinning it with the long side onto the circle. |
 |
| Pin it all the way around. The rectangle WILL be longer than the circumference of the circle. It is supposed to be like that. |
 |
| Pin it to where both ends will stick out. |
 |
| Now start sewing the circle and rectangle together. Begin at the point where the fabric overlapped. Pull out the pins as you sew and make sure the bottom layer stays smooth. Just take your time and if you take a break, leave the needle down to keep it from shifting. As far as the seam allowance goes, I usually do a 3/8" seam. It is exactly half the width of my sewing foot so all I need to do is to line up the side of my foot with the fabric edges. You can also use the marks on your sewing machine. |
 |
| This is what the overlapping part will look like. It's ok if there is a tiny gap, but it shouldn't be bigger than about 1/4". |
 |
| Now fold your bucket in half, with both long sides leveled up. I want you to measure how much fabric is overlapping from when you sewed around the circle. In my case it was about 1.25", but in case your rectangle was 40" or longer, it will definitely be more! |
 |
| Now take a ruler and draw a line all the way down your long, unfinished side. Again, in my case it was 1.25". |
 |
| Now pin the two layers together. I added a few marks on the top to help you visualize everything a little bit better. The dotted line is where you sewed the rectangle onto the circle and the other line is where you will be sewing the two ends together next. |
 |
| Now sew right on the line..all the way down. Don't forget to back stitch at the beginning and end. |
 |
| Now cut the excess fabric but leave between 1/4" and 1/2" . |
 |
| To keep it from fraying and to secure the seam, zick zack stitch down the long side, as well as around the circle part. |
 |
| I think the "worst" part is over. haha. Doesn't it already look pretty good? :) This is what the inside looks like. |
 |
| And now turn it to where the seams are on the inside. You are more than half way done!! |
 |
| To finish up the top, you need to fold it over twice. I did 1/2" and 1". It really depends on what looks best to you. I think a wider fold would look great as well! |

**************************
I added two handles to the toy bucket, which is optional.
 |
| Here is what I used for the handles. It's called cotton webbing. They also sell them in polyester and both come in different widths. |
 |
| Cut two 9" pieces. |
 |
| Fold each end 1" over and sew it in place. |
 |
| Put your webbing pieces aside, fold your bucket and measure the top width. It should be 18". (give or take a little, depending on your seam allowance you used earlier.) |
 |
| Find the middle of your bucket (in my case 9") and measure about 3" from top. This is where the handle will go. Mark it with fabric marker or a pencil so you can find it later on again. Now turn your bucket around and do the same on the other side. |
 |
| Now find the middle of your webbing and line it up with the little mark. Pin each end onto your bucket. |
 |
| Sew each end onto the bucket. I usually sew a 1" square and also a X on top of that to make sure it won't come off. Now step back and admire your work!! |


I hope you enjoyed my little tutorial. I think it took me longer putting this together than actually sewing the bucket. haha.
If you have any questions, please feel free to ask me!
ENJOY!!


