Thursday, January 17, 2013

Toy bucket tutorial

I LOVE any type of containers to keep things organized. Having 3 boys doesn't always make it easy to keep things neat though. I had this cute little fabric bucket for my 8 month old but after Christmas it couldn't fit all of his toys anymore that we keep for him in the living room. 
Now I finally made him a bigger one.

Before

After
**************************************

I bought this pre-quilted fabric on sale at Joanns some time ago. Never knew what I would use it for..until today. Pre-quilted fabric is awesome because you don't have to worry about buying matching fabric and stabilizer, but most of all, it saves time!

First of all, you cut your two pieces. The first will be a rectangle. 15" x 40". If your fabric is 42" wide, just leave the 2 extra inches on. It's not really necessary to trim it because later on you will have to trim it anyway.

Your second piece should be at least 13" x 13". You don't have to be completely exact on this one either because you will trim it as well.

Now take you 13x13 square and fold it in half. It doesn't matter what fabric side is face up or down.


Now fold it in half again. Two sides should have rough edges and two sides folded edges. Have the two sides with the folded edges facing to the left and down. (Your square will have 4 fabric layers all together.(

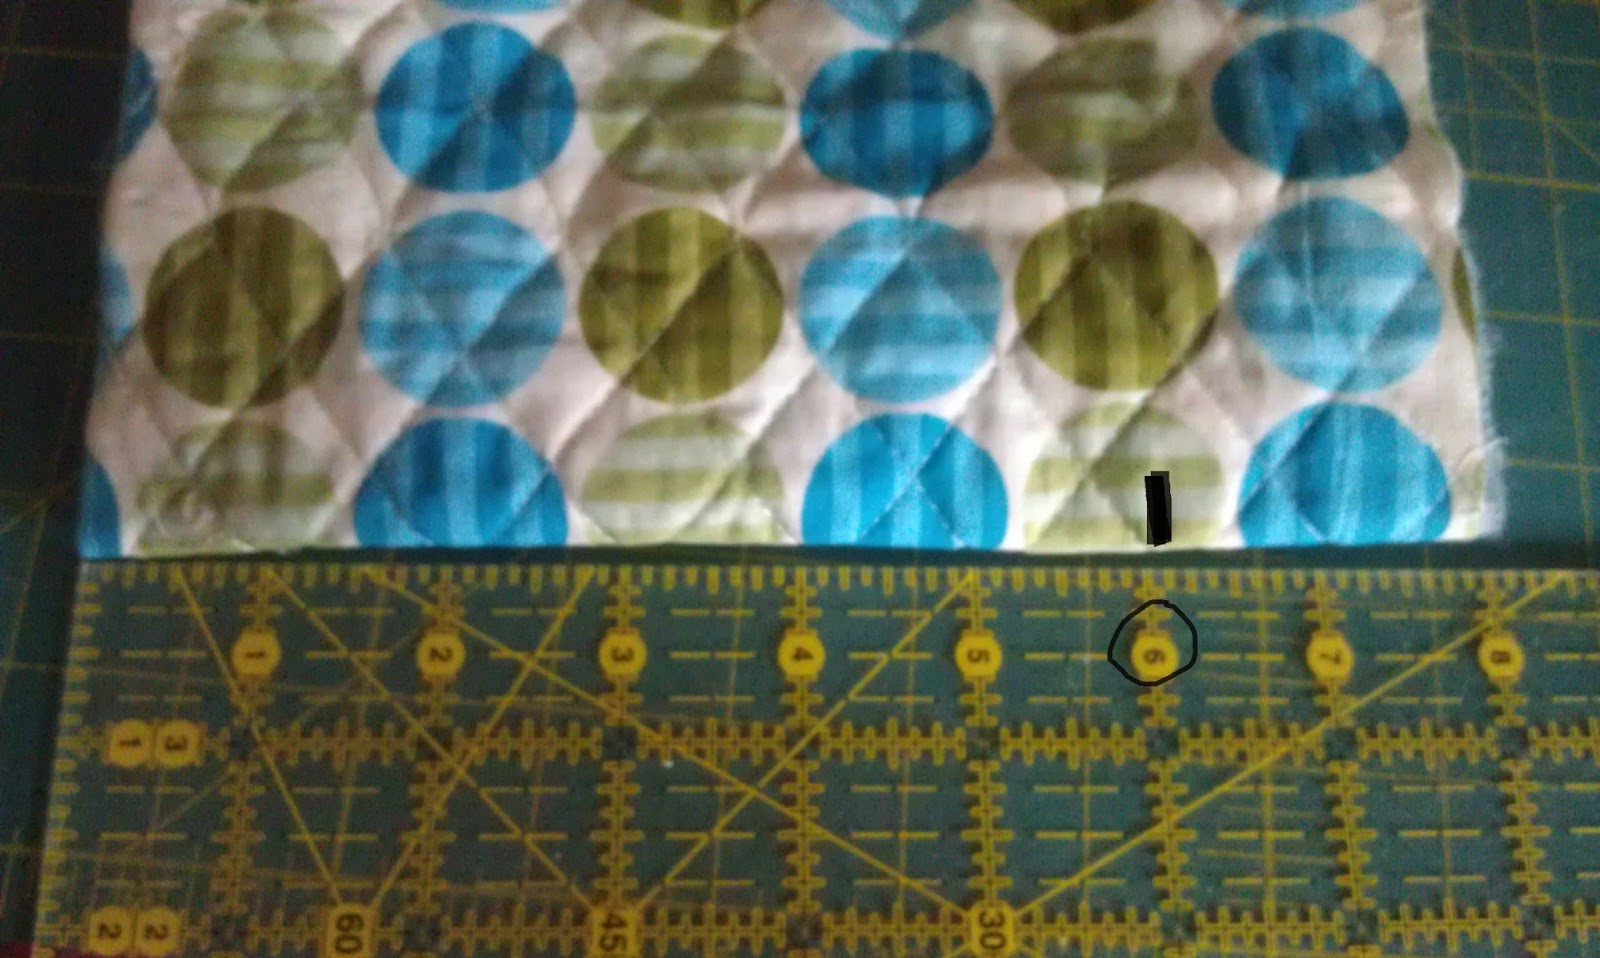
Take the ruler and level "0" on the bottom left corner. Meassure 6" and mark it with a pencil or similar.

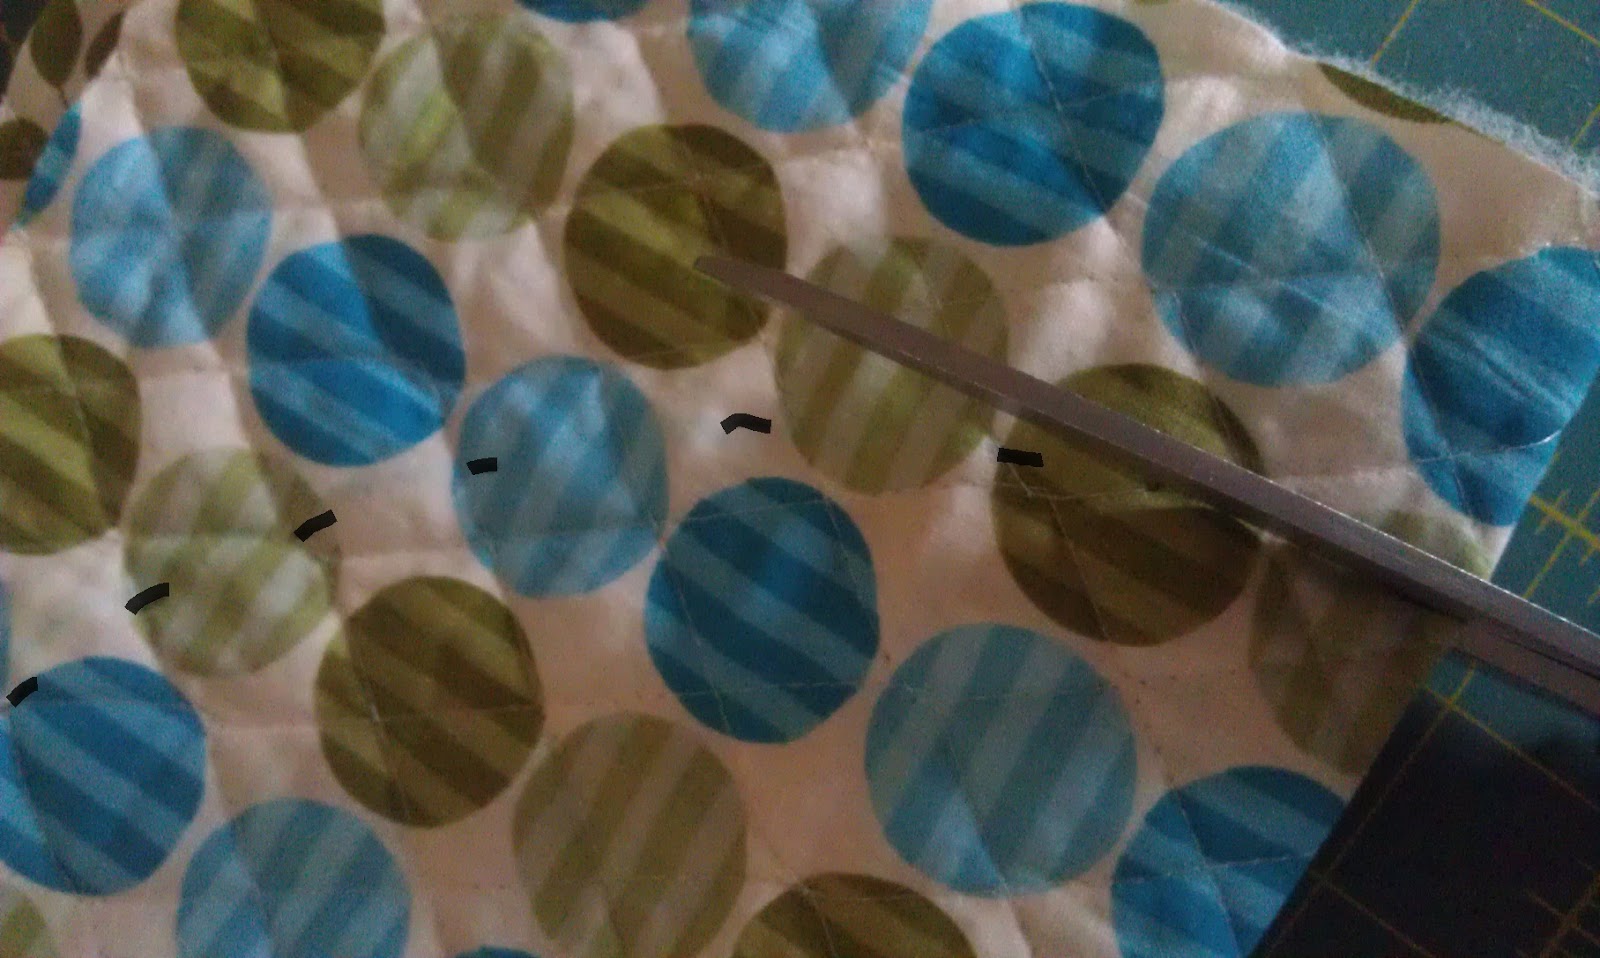
Now keep doing this as seen in the picture, all the way to the left edge. Make sure to level "0" or "6" on the corner, to make sure every mark is 6" from the corner.

Now cut along the marks, holding the fabric together with your other hand .

Now unfold and you will have a 12" circle.

Decide what fabric is going to show on the outside later on. Let's call the side with the outside fabric O and the side with the inside fabric I. Place your fabric with O facing up on your table. Now take your long rectangle piece of fabric, and start pinning it with the long side onto the circle.

Pin it all the way around. The rectangle WILL be longer than the circumference of the circle. It is supposed to be like that. 

Pin it to where both ends will stick out.
Now start sewing the circle and rectangle together. Begin at the point where the fabric overlapped. Pull out the pins as you sew and make sure the bottom layer stays smooth. Just take your time and if you take a break, leave the needle down to keep it from shifting. As far as the seam allowance goes, I usually do a 3/8" seam. It is exactly half the width of my sewing foot so all I need to do is to line up the side of my foot with the fabric edges. You can also use the marks on your sewing machine.


This is what the overlapping part will look like. It's ok if there is a tiny gap, but it shouldn't be bigger than about 1/4".

Now fold your bucket in half, with both long sides leveled up. I want you to measure how much fabric is overlapping from when you sewed around the circle. In my case it was about 1.25", but in case your rectangle was 40" or longer, it will definitely be more!

Now take a ruler and draw a line all the way down your long, unfinished side.  Again, in my case it was 1.25".
Now pin the two layers together. I added a few marks on the top to help you visualize everything a little bit better. The dotted line is where you sewed the rectangle onto the circle and the other line is where you will be sewing the two ends together next.

Now sew right on the line..all the way down. Don't forget to back stitch at the beginning and end.

Now cut the excess fabric but leave between 1/4" and 1/2" .


To keep it from fraying and to secure the seam, zick zack stitch down the long side, as well as around the circle part.

I think the "worst" part is over.  haha. Doesn't it already look pretty good? :) This is what the inside looks like.


And now turn it to where the seams are on the inside. You are more than half way done!!

To finish up the top, you need to fold it over twice.  I did  1/2" and 1".  It really depends on what looks best to you. I think a wider fold would look great as well!

Now sew all the way around the bottom of the fold to make sure you catch all layers. Now your bucket is DONE!!! 

                                 **************************

I added two handles to the toy bucket, which is optional

Here is what I used for the handles. It's called cotton webbing. They also sell them in polyester and both come in different widths.

Cut two 9" pieces.

Fold each end 1" over and sew it in place.

Put your webbing pieces aside, fold your bucket and measure the top width. It should be 18". (give or take a little, depending on your seam allowance you used earlier.)

Find the middle of your bucket (in my case 9") and measure about 3" from top. This is where the handle will go. Mark it with fabric marker or a pencil so you can find it later on again. Now turn your bucket around and do the same on the other side.

Now find the middle of your webbing and line it up with the little mark. Pin each end onto your bucket.


Sew each end onto the bucket. I usually sew a 1" square and also a X on top of that to make sure it won't come off.


Now step back and admire your work!!


I hope you enjoyed my little tutorial. I think it took me longer putting this together than actually sewing the bucket. haha.

If you have any questions, please feel free to ask me! 

ENJOY!!

Sunday, December 30, 2012

Storage solution for small Christmas ornaments


Today I put down my Christmas decoration. This year I bought a few more ornaments and therefore ran out of room in my storage box. So this is what I am using for now. 

I remember seeing this somewhere else before so I put two of my egg cartons aside. They are perfect for small ornaments!

I filled up both of the cartons and put them in a sturdy shoe box. (I always keep shoe boxes. They can be used for so many different things!)

Now that my house looks empty I wonder what kind of decoration I should put up next??

Turn an old sweater into matching scarf and leg warmers

I have this very pretty sweater that was given to me for Christmas a couple years ago. Unfortunately it's way too short. I really like the color though and for some reason I could not give it away because I kept thinking that maybe I can use it for something else.
So here is to all of you who are holding on to sweaters that are too small, short, or have a small stain but you just don't want to get rid of them!
 
There are many possibilities, (first I wanted to turn it into mittens) but I decided to make a scarf and matching leg warmers.
All you need is (besides your pretty sweater):
- fabric glue
- scissors
- buttons, brooch, other accessories to pimp up your scarf (optional)


So this is my sweater. Pretty, isn't it? :)


Then you take your scissors and cut a straight line across, right under the arm pit. Don't be scared! 


This is what you will work with. Yes, you definitely won't be able to wear it anymore now. Don't throw the other part away, we will need it later.


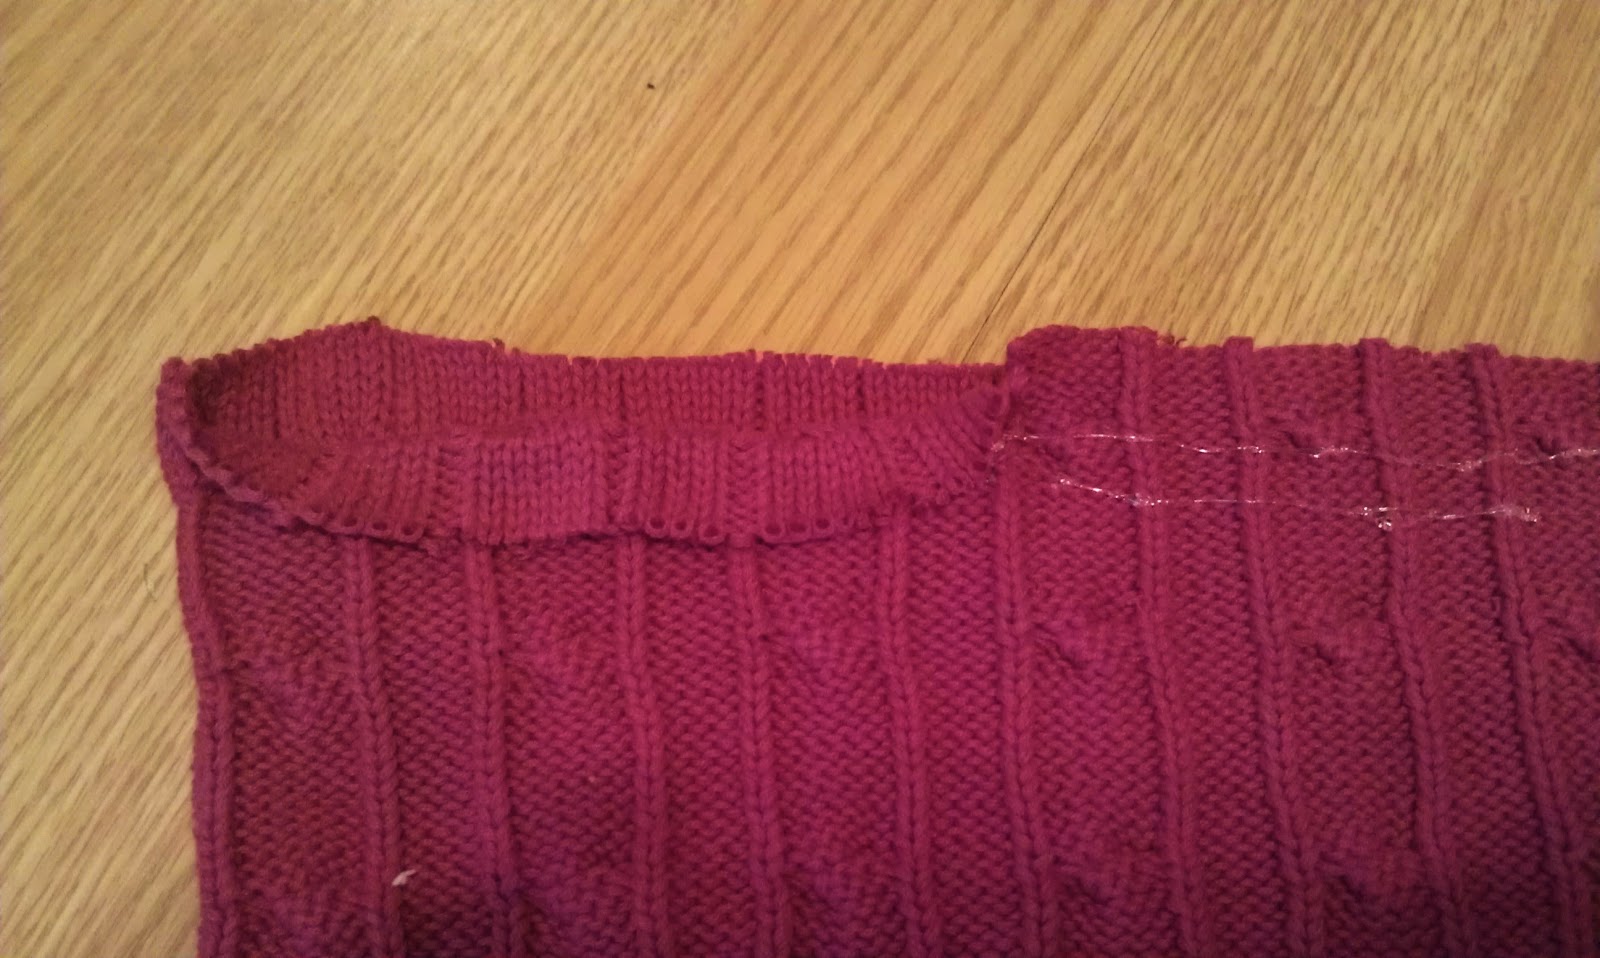
Now turn it inside out. Add two lines of fabric glue to the end that you just cut. Only add a few inches at a time because it dries quickly! Carefully fold it over and slightly push it down. Make sure the glue won't go through and stick to the other layer. You might want to put some paper in between just to make sure. There are so many different types of fabric glue out there. This is what I used and it worked just fine. Just make sure it says it's washable.


Turn your sweater/scarf back around and this is what it should look like. And that's it! You are already done. How quick was that?


You can also add some buttons, a brooch, pins, or anything else you would like to dress it up. I only had buttons at home but you get the idea.

Wasn't that easy?! 


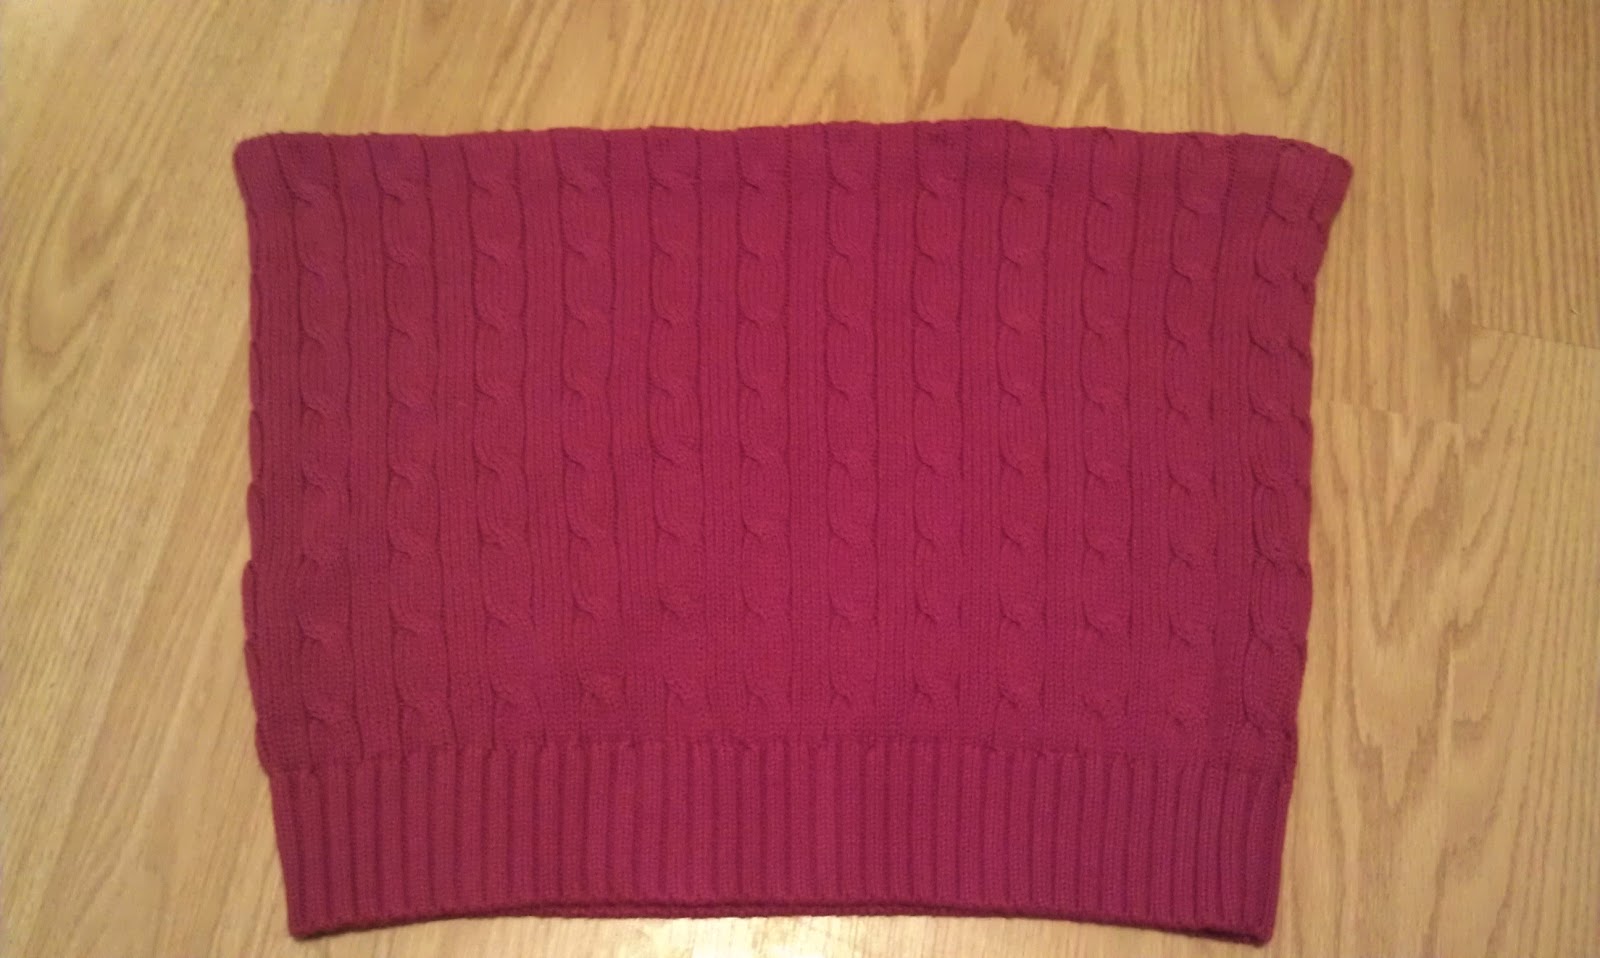
Now if you want to make the matching leg warmers, go get the other sweater piece that was left earlier. It should look something like this.


Again, start cutting right under the arm pit straight up.

Fold and glue the edge you just cut, let it dry for a few minutes and you can already wear them! As you can see I am wearing mine with knitted boots, which is probably too much with the knitted sweater leg warmers. I just wanted to show you real quick what the end result would look like. Also, if your sleeves are wide enough at the wrist part, you can wear them to where that part is showing, instead of the cut and folded end.

Now you have your matching scarf and leg warmer set and the best thing is, it was FREE!


Thursday, July 5, 2012

How to get stains out of baby clothes

My two months old little chunk can mess up quiet a few outfits each day. I am sure you know what I am talking about! With my first I tried all kinds of sprays to get the stains out, until I finally came across this very easy, all natural, and FREE solution. It is so simple and works for poop or carrot stains. :))

First I try to wash it..because sometimes it will come out anyway. And sometimes it looks like this: 
yikes!

So here is what you do. If it's still damp from the washer, simply lay it on a flat surface in direct sunlight. If the clothes is dry, spray it with water until the stain is throughout wet.


And now all you have to do is wait until it's dry....and voila! the stain is gone. 
No harsh chemicals and the best thing, it's FREE! I would just recommend to wash it again since the fabric is probably a little stiff from laying in the sun and maybe dirty again with pollen, etc..


Now you and your little ones can enjoy the cute baby outfits a little longer without getting frustrated about stains anymore. 

Monday, January 16, 2012

quick and easy lamp shade makeover tutorial

Being in the military we move a lot. Sometimes it's a challenge to make all of our belongings look good in every new house we rent. So instead of buying new stuff, I try to simply change up the look of different things we've already got.
This is one of my quick and easy projects I did this last summer. I never thought about posting this little tutorial, that's why the picture quality isn't the greatest. I promise I will do better in the future! :)

This is all you need:
- a plain colored lamp shade
- any color/size rick rack
- glue gun or Elmer's glue

This is what I had to work with. A small, white lamp shade.


I started at the bottom, always gluing a few inches at a time. Take your time and make sure it's straight. When you get to the end, cut the rick rack a little longer first, then trim it back as needed.


Continue until you fill out the whole lamp shade, using different shapes and colors.


And voila! You are already done! :) 

Wednesday, January 11, 2012

My new diaper bag design!

I've been working really hard on this one for the last few days and now I am finally ready to show it off!! I really love this bag because of all its great features. The first one I should mention is, that you can adjust the size (width) of the bag. You simply pull on the straps attached to the side of the bag and voila. It is transformed into a much smaller, more purse type of bag. The straps are also great to carry extra blankets and clothes in case your diaper bag is already full.
The bag comes with a set of regular shoulder straps, as well as one large adjustable strap.

open                                                                             closed


The inside - 5 pockets overall. One of them is a hidden pocket with zipper closure.


In the back I added a large zippered pocket that is lined with wipeable fabric. We all know Babies can get messy..so next time you have one of those dirty bibs or burp cloths, you don't have to worry about getting everything else dirty. Simply put it in the back pocket and wipe it clean later on when you're back home.


The side pockets are pleated which will give you plenty room for any type of bottle.


The front is divided into two large pockets. Plenty of extra space!!
The bag closes with two magnetic snaps but also comes with an adjustable strap. This comes in handy when you have a lot to carry around and need that little extra room. The button at the end of the strap will keep the strap from pulling through. This way all of your belongings will stay in place.


Last but not least I should mention that this bag is machine washable:
Gentle or hand wash cycle, cold water, air dry or tumble dry low.